|
Qui-Gon Jin
Another Qui-Gon unicorn. This one has the accurate grip section, which made fitting the electronic really close to impossible. The hilt design comes from a joint effort of Vader's Vault and Saber Concept, somewhere back in 2011.
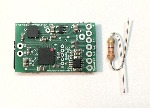
The LED is a GGW tri-cree along with a Crystal Focus v6.I spent a complete afternoon making my way thru the battery pack install, used some 14500 tenergy cells I bought from LDM long ago. Finding the cell "sweet spot" was the key, as tolerance are super hard in there (think bazooka fit). The heatshrink is never even, and by rotating the cell, I ended up finding the right orientation. Those 14500 are unprotected cells, I managed to fit a PCB on the milled area on the right side, after protecting it with kapton tape.
♦ Always Plan-plan-plan your wiring

I machined a black PVC ring, and I used a smaller 1.3 mm recharge port, glued on it with cyanoacrylate activated glue (spray). It slides in position to genlty press on the jedi logo (the fragile area).
Then that regal 22mm speaker goes right behind, glued in place, and impeaches the recharge port / ring to slide back.

However with that method, there was no way to hold the inner section in the pommel itself (or there was a method but as I'm not following any install instruction...). I sanded just a bit the rear of the shroud to get it easier to slide forward, and I drill a synchro hole all the way thru the hilt, to snug the pommel with the insert. There's no way to "forget" about it and start unscrewing, as the pommel is stuck with the screw. All what is needed is to remove the covertech, slide a bit the shroud, remove the set screw, push the insert, and unscrew the pommel.
The CF is accessible right behind this, and so is the SD card. Not so bad to gain access to the inside, no glue to remove, nothing permanently attached

stacked 2x 10 ohm / 2W bourns resistors = 5 ohm / 4 watt for FoC

For the main switch, I finally used neither the O-ring, nor the "screw from the top" technique (no pun intended), but made a cheap and dirty inverted bezel out of one of the shiton of copper cap I have left. Electric file rules. The nut is sitting flat on that, allowing to tighten the switch and easy disassembly.
Top red button was glued with gorilla super glue after cutting some 45° harpoon teeth/grooves on both surface, not coming out :045:

I replaced the beveled covertec with one of the new TCSS covertec screw (flat back). Kept the original allen key screw look by milling a bit the covertec and epoxying the screw head. Like on my negociator, this can be removed by hand. I still need an allen key to remove the pommel and tighten the blade screw though.

Made a kill key out of a led bezel + 3mm green diffused led, on a machined PVC rod, keeping the green (green blade) along with metal + black color scheme. Not very original but gets out of the "crystal" or "gem" alley which doesn't fit the quigon saber IMO.


I realized the hole on the stand can possibly hold the kill key


|


