|
||
|
The project of a costume stayed a bit behind for quite a while, due to a huge work amount in luxeon saber technology. I finally decided to make my costume during summer 2006, targeting my venue to an important european convention called FACTS, in Gent, Belgium.
My girlfriend has been a important and massive help in this task, especially to demystify strange sewing terms and techniques and... she's much better than me for matching color, style and fabrics. Nothing really new, it's a... Jedi Costume... I'm just getting this dream come true. I was however looking forward to build something new and decided initially to craft the saber of ObiWan Kenobi episode I/II, and I then move to a costume similar to his. I don't look like Obiwan. I don't have the same face or hair cut, nothing really matching either episode I or episode II. Little beard and mid-short hair, I therefore decided to get the Obiwan costume BETWEEN ep I and II ! General References • Costume & Props Padawan's Guide Dressing the Galaxy, The Costumes of Star Wars- Trisha Biggar The Star Wars Complete Visual Dictionnary (Nathan or D&K) • Saber Parts of StarWars Sith Archives • Belt : Padawan's Guide. • Reference pictures : To craft a proper costume, I've used 2 reference pictures on which I could use a visual element as a scale reference : the food pellet capsule. It measures 5.5cm The second photograph being frontal and properly alaigned, there's not much deformation and a scale factor is easy to obtain. The first pictures is slightly taken from the side but could be used to confirm (1-2 mm of accuracy) some of the measurements.   Belt Most of the part were bought at the BHV, a huge general & hardware store in the center of Paris. They have leather belts as well as the lateral rivets. The main belt was cut at 5.5 cm (thanks to the reference picture showing the belt and the food pelet), and the secondary thin belt at 1.5cm. I actually suppose it's 1/2", but I've decided to move all the measurements in the closest metric value. I cut the leather with a long aluminium rular that has anti-slipery pads under and using a strong cutting knife. Make sure the rular is firmly applied on the leather so that it does not move during the cut. Positionning the rivets is a dilemma. I've stared to the reference pictures for quite a while as well as in the SW visual dictionnary. It's not just like placing the rivets like on the pictures, unless you size exactly as McGregor. Rivets must be placed so that you have the right positionning of the accessories (food pelets & pouches). A little tip : take all the measurements wearing the costume, because of the numerous layers of fabric, you'll add several centimeters to your waist. Mark the edge of the belt with electric tape to know where the center is. On the picture below, the right side of the belt is steady and matches half a perimeter of the waist. The left side will be mobile for the adjustments. The way the belt is made (assymetric) IS the reason why positionning the rivets is not that simple.  I ended with positionning the font rivets at 13.5 cm from the front center (buckle), and the back rivets at 15.5 cm from the back center Buckle Various explanations have been given for sourcing a buckle like Obiwan has on his belt. Some said it's been salvage on italian shoes or a woman perce. Anyway, I had the choice between buying one on ebay, or building one. I had my lathe and milling machine for a really short time, and that was a perfect exercice ! I finally found a picture I've shot at "SW l'expo", the exibit in Paris. Slight blured (no flash) but almost straight in the direction of the buckle and not a lot of parallax. ? Knowing the scale of the belt (with the food pelet), I've been able to measure the buckle and adapt everything to my 1.5 cm wide secondary belt. First, I machined an aluminium plate from a 25 mm diameter rod.  ? Then, after some patience and efforts, I got this. Sure it's not functionnal like the original, but it's mine ! I still have to polish it.  ? The rings of the buckle I cut them in 3mm thick aluminium. To reduce the time of the machining, I milled the 2 rings in one operation, but stacking to layers of aluminium. I used a 3m milling bit to cut around and inside the rings. Stressing job, but it ended well. The rings were tied to the buckle using a nail and a drop of cyanoacrylate glue on each side to prevent the nail from moving away. Polishing with car sand paper, grit 400... et voila !  ? The belt starts looking like a belt. I still have to make the back fold and the little leather rings that hold the secondary belt to the buckle.  Pouches I bought 2mm leather for those ones. It's hard to find small quantities of leather for a good price, so I bought a whole one, 1.5m2. It's really too much but I'll use the rest for other stuff made of leather. I'm using professionnal leather dye (stains clothes and skin, wear gloves and old clothes) and I've also bought a special varnish for the side of the belt. It's an acrylic coating that covers the naked side of the leather. ♦ MEDICAL POUCH : let's be honnest, if I'm right Obiwan is not using this one in ep I or II. However, I needed something simple for my FIRST ever leather work. I've decided to make a design without any sewing, just folded leather and rivets, like the pouch of my Leatherman knife. I folded the leather using a little bit of water on both sides. Then I marked the location of the holes and punched them with the adapted tool. The riveting also creates the clip for the belt. It passes within 2 layers of folded leather and the pouch cannot go away, it's impossible to loose it. Positionning the rivets must be done carefully, taking in account that the belt has to pass thru it. Not too loose, not to tight. • Cutting the leather : in my local hardware store (Bricot Dépot), I found a really nice knife, really ergonomic and sharp, the brand is Magnusson. For 6 euros, it really made my day. • Dye : I hate using a brush, despite all the advices some people gave me, It's really hard to obtain a uniform color. I prefered to use a piece of fabric with wet with dye, and you rub the leather. It uses more dye since you have to keep the fabric wet but the result is really nice and not difficult. For the inside (the "hairy" side of the leather), a brush totally fine. Let the leather drying for 2 hours between 2 coats of dye, so that it dryes well, first, but also to get the real color and see if you need an additionnal coat. Generally, 2 coats is fine. • Finish : use a q-tip to apply the acrylic varnish on the side of the belt. Have some wet disposable tissues or q-tip to remove extra drops. It's acrylic, so water gets rid of it easily, but only if done very quickly, it dries pretty fast. Because of the alcool base, dying leather dries it internal structure, and it will become creaky. You need to hydrate the leather once the dye is dry. Use a reparing cream for damaged leather and finish with non colored shoe wax. Rub, rub, rub !  ♦ LATERAL UTILITY POUCHES I've seen many of those on ebay, most of them being made of wood, painted resin, and most of the time non-functionnal. Some are really UGLY ! I wanted to make my own, fully functionnal (to store buisness cards !), good looking and made of leather, just like the medical pouch. The main difficulty is the wavy aspect of the leather, on the front of the pouch. • Cutting the leather : Like the medical pouch, a single piece of leather for the base of the object. (body and top of the cover). I made the template on a simple piece of paper.  • Waving the leather : I've built a custom tool to creates the waves / grooves. The leather piece is wet with water and sandwitched in the 2 halves of the tool. I left it in the press for 4 hours to dry :    You'll need to flatten the sides before gluing this piece to the body, otherwise you won't have enough contact surface. Wet the sides with just a bit of water and press using 2 pieces of particle wood (flat and non agressive surface). • Top of the cover : it's another piece of leather with a large cut in the center and glued under the top tape. Again, shape with water, use little clamps to maintain in place when it's drying. Glue and dye. • Locks : Like on the medical pouch, I've used a rivet lock composed of 2 halves that "pops" together. The design of the pouch is similar for the back too, the belt passes thru the pouch and it's impossible to loose it.  ♦ ABOUT LEATHER Once dyied, leather dryes so much it needs to be hydrated with wax. Prefer a repairing cream for shoe care, avoid the liquid ones, in general they have a foam applicator that hides a little plastic injector and it can harm the leather if you press too hard. The good old technique of fabric and paste/cream and elbow oil is the key. The reparing paste will durably penetrate the leather and will keep it flexible. Classic pasty shoe wax is then perfect for usual care of your leather belt, to keep it shinny and dustless. Food Pelets They are based on a Steadler pen cap, model 417 or equivalent. We can find some locally in Paris, at Gibert (Book store and paper shop) or they can be ordered online from welcome office. The classic technique is to glue an acrylic rounded tip on the bottom of the cap (clothe button or andy acrylic half sphere) and then painted with gold, silver and copper painting. Those paints usually do not like further coating, and the paint will rip off very easyly. They get used very very fast. I've decided to cast my own pelets using pigmented resin. For that, I molded the cap using RTV liquid silicone (catalized in about 12 hours). The first attempt. Comparison between the original cap and the casting (with a stock clip)   • Clip : Casting the caps is neat, but I did not like the idea to buy tons of pens just to get the clips. I bough some galvanized steel plate at Leroy Merlin, one of our Hardware Store. 5/10th mm of thickness, I cut it into many tapes. The galvanized finish is not as beautiful as the chrome of the stock clip, but at least if does not stain. Moreover, the clip is almost invisible since it behind the inside of the belt ! Using my little drill press (for electronic PCB drilling), I created the insertion hole of the clip with a 0.8mm drill bit. The end of the clip is dremeled with a harpoon / arrow head profile so that when it's glued with pigmented resin, it's impossible to remove it. I paid only 2.5 euros for 12x100 cm of galvanized plate (and I can do a sick number of clips...) • Resin : I used polyester resin of the brand synthofer (they make various products for car and boat repair, polyester putty, glass fiber). Cheap enough and you don't have to buy a huge amount of it (0.5 l). It's pre-accelerated and it catalyses quickly. I include aluminium powder in it to improve the mechanical strength and it's an easy way to obtain the silver food pelets. I made light and dark silver nuances using black ink (chinese ink). Adding a few drops give the appropriate contast. The result is less shinny than paint, but it will last virtually forever, what I was looking for.   My own resin recipe (follow this stirring order) - Pre-accelerated resin (synthofer, Leroy Merlin) - 2 drops of cobalt accelerator (Adam Montparnasse, Paris ) per 20g of resin. Accelerate the resin to fight the acrylic base of the pigment (see below) - 3% (weight) of catalyst, instead of 2% - 8.7% (weight) of color : acrylic paint (brand "Pebeo") copper and gold. Really cheap, crafting/DIY/Art section of BHV, Paris. Normally, you should use neutral metallic pigments (metal powder), but it's extremelly expensive. - A little bit of aluminium powder, for the metallic aspect and mechanical strenght improvement. Mine comes from an arametal pack (epoxy bi-component metal reparing kit), the resin is awful, so I kept the power, which also acts as a catalyst. - Stir very well. Pre-heat above 20°C and stir again. Pour in the mold, heat in a dedicated oven at 50°C and cut the oven as soon as the temperature is reached. Polymerisation will be done in 2 hours, but leave the molds in a warm place for 24h before removing the piece from the mold. ⇒ Put the stirring pot in the oven with the molds, this way you'll know when the polimerisation is over, buy checking the pot without touching the molds. The RTV liquid silicone used for the molding comes from Adam Montparnasse. I used some 28 mm OD PVC plumbing pipe for the outside of the mold. The rounded tip (abaqueplast.fr) is glued on the cap and pinned on a nail on the bottom of the mold. The silicone is solid after 12 hours. ?Results   Pants I bought it at Decathlon, a well known sport shop in France. Those are trecking pants. You just need to get rid of the logo on the knee, otherwise, the color is perfect, a light beige just like in the movies. 8 euros.  Outter Tunic & Tabards No big surprise, I'm using the dedicated template. About 10 euros at the Marché St Pierre in the northern disctrict of Paris where you'll find everything about fabric, dyes, sewings etc. I bought the pattern at Reine, one of the shops, they have a better stock of patterns compared to others. It's the classic Simplicity 4450.  I'm 1m71 tall. I bought the tunic fabric at Dreyfus ("the other shop" of the Marché St Pierre area). It's not exactly the same texture as the original costume, but I love the color.  Pure wool, and there were some nice discount prices during the summer : 3 euros the meter. With 5 meters and my girl mastering sewing, it was enough, I even have a bit of spare fabric. We had to make several modifications on the pattern, using the scales and measurements gathered from the reference pictures (see above). ? Adapt the width of the fabric belt ? Tabard were supposed to be curved on this pattern. It uses lot of fabric. We cut them straight : we simply change the direction of the tabard on the waist. Sewing will be hidden under the fabric belt (called the "obi"). ? Shoulders : we added the fold as seen here. ? Sleeve length : longer after the wrist and the end is not cut straight, but in diagonal. Under Tunic Like this picture displays :   ot has long sleeves. I use a basic coton t-shirt bought at the supermarket. 7 euros. Coton is nice since it isolates the wool of the outter tunic from the skin, making the costumer easier to wear. Boots 95 euros from San Marino, Shoes Shop in the Forum des Halles, Paris. I have small feet, I therefore can buy... women boots ! (lots of choice).  Saber It's with this prop that everything started, as explained in the introduction. It's been also my first real metal work on my lathe and... it's been a hard time ! Black parts are made of polished PVC, the rest is aluminium. The red button comes from a computer case (tuning part, LDLC.com). The brass part is an inflating adapter, just like on the original saber, I use it as a blade lock screw. This replica is almost at scale 1:1, except the head / emitter, 2mm bigger in diameter. Also, the grips are not as deep as in real, since I had to fit the electronics inside. I'm using a blue luxeon K2 at 1.5 amp, with a 6 AAA rechargeable nimh pack. The pommel end can be unscrewed and allow recharging and inserting the safety key. 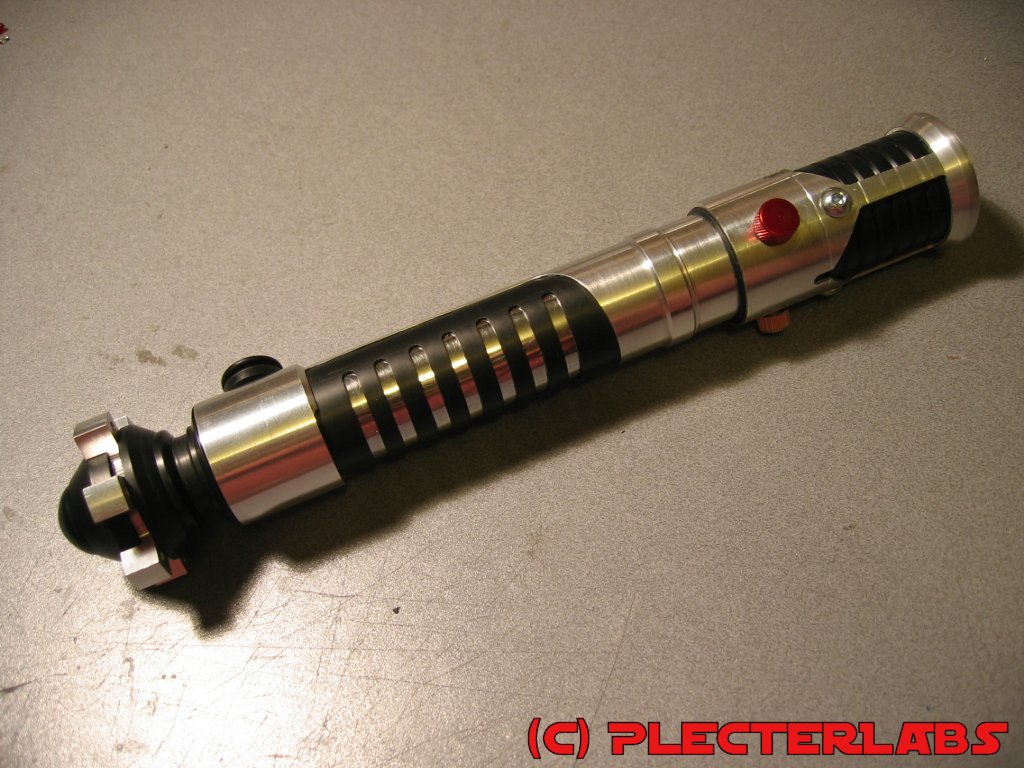 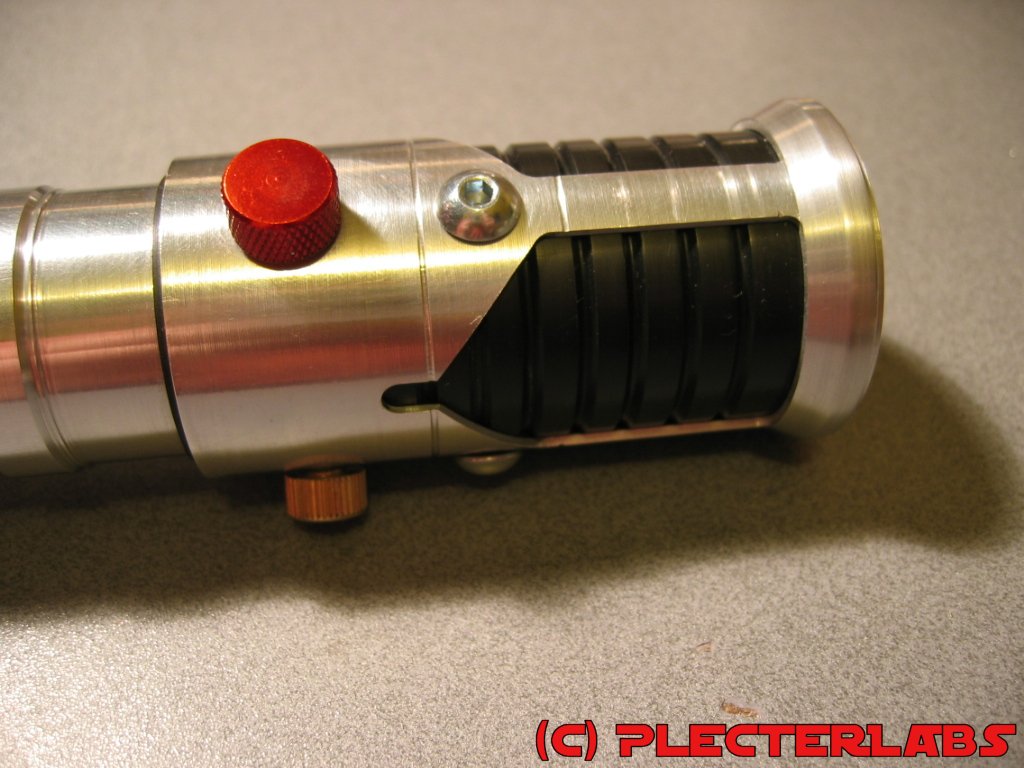 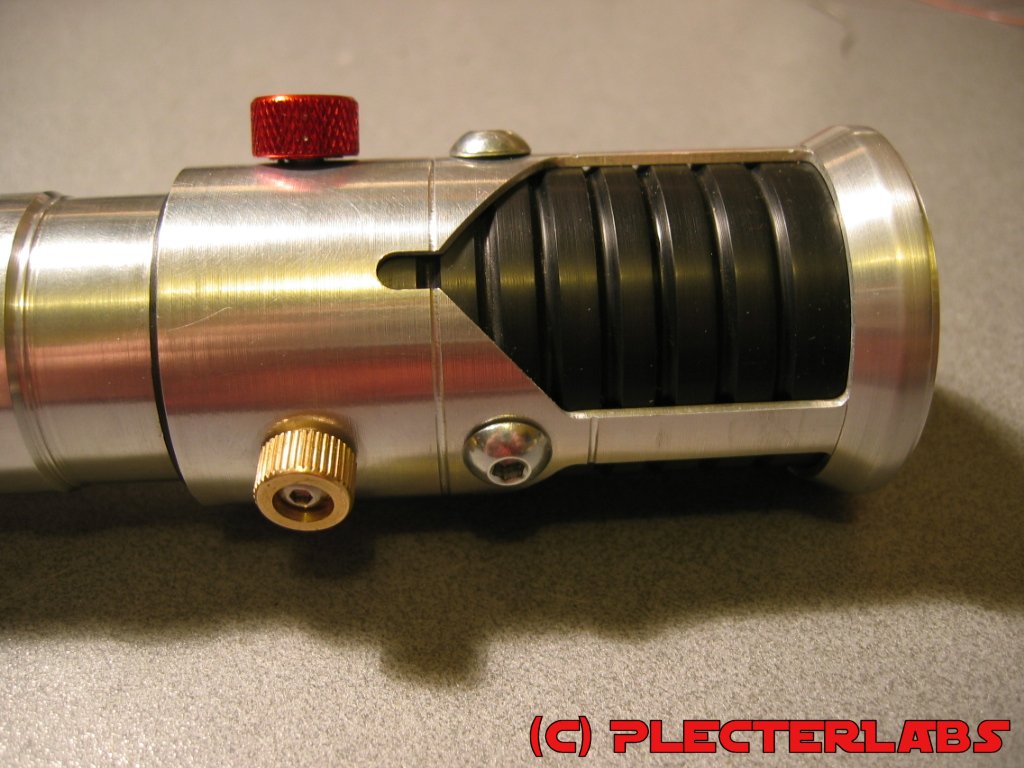  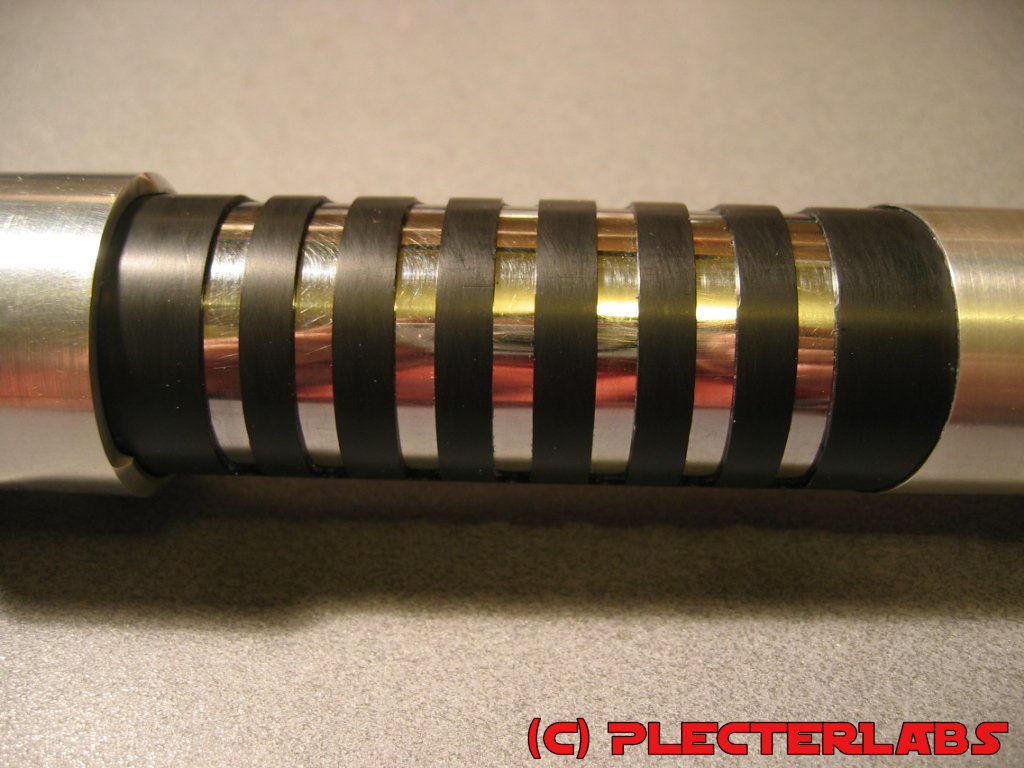 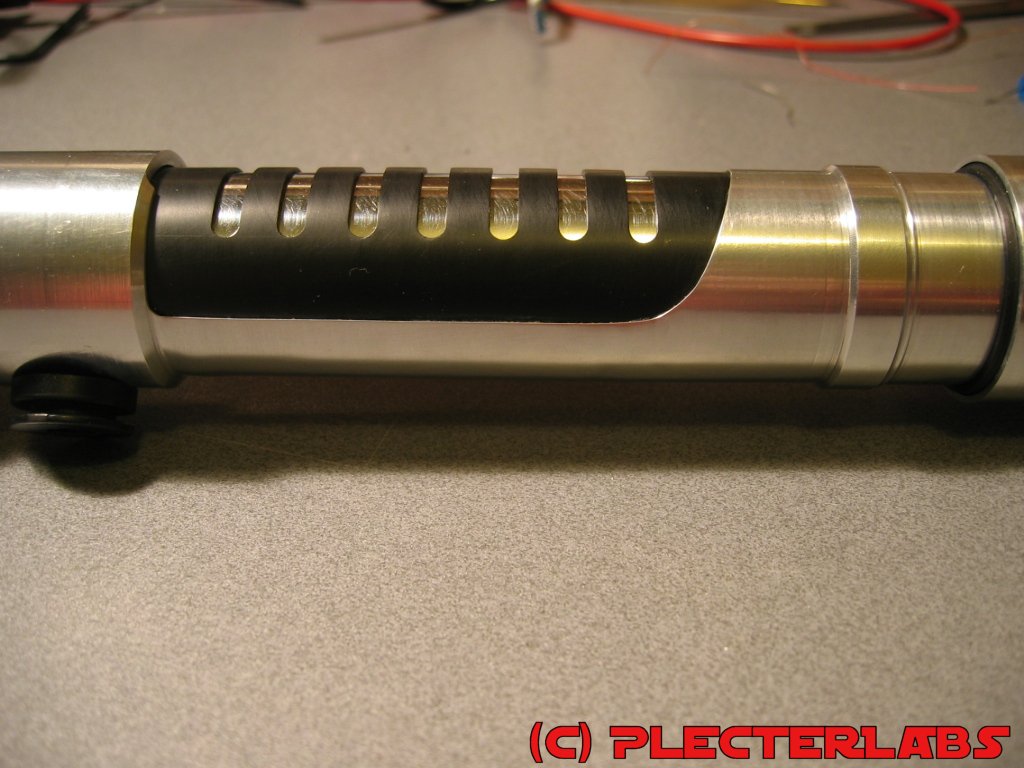 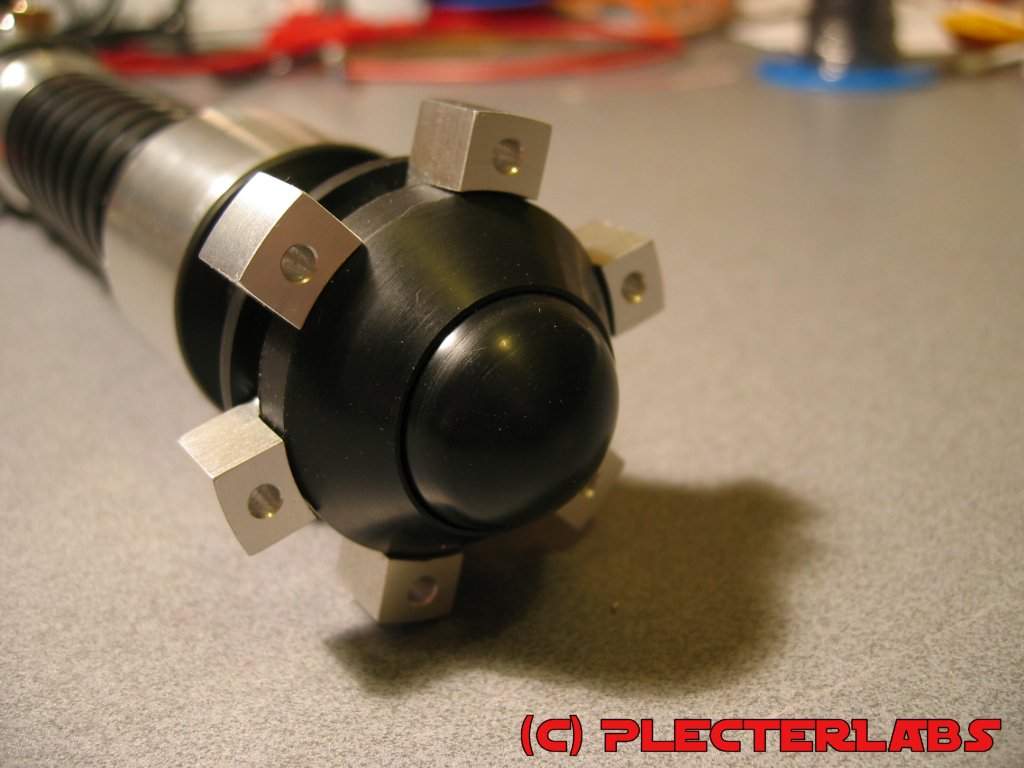 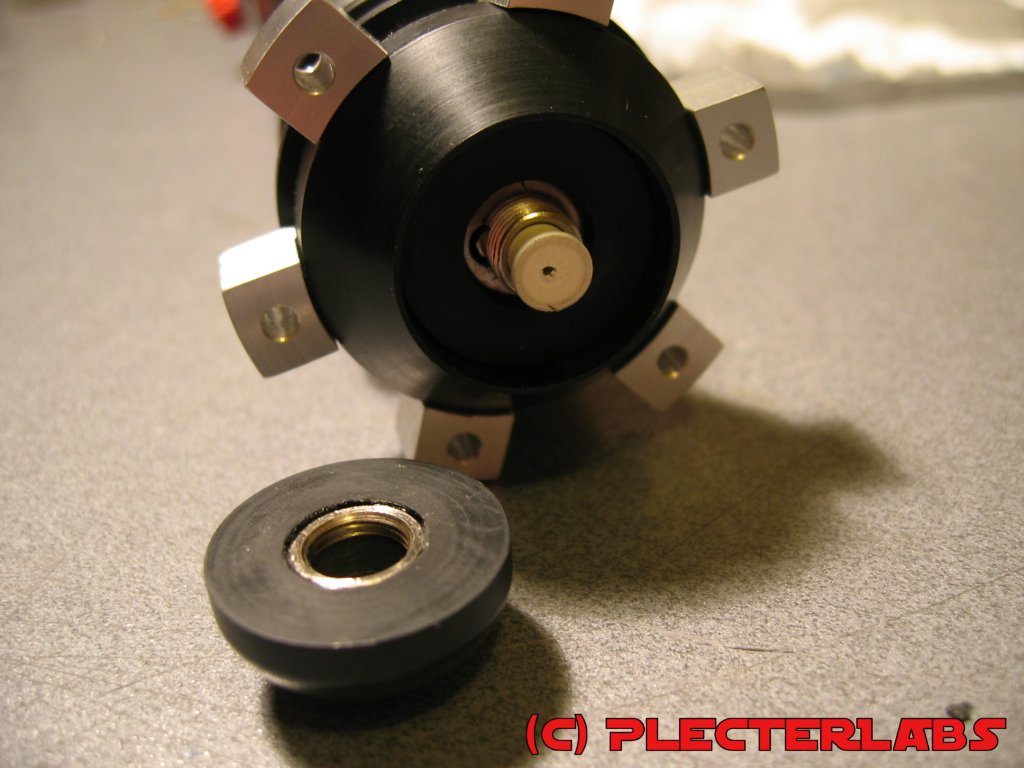 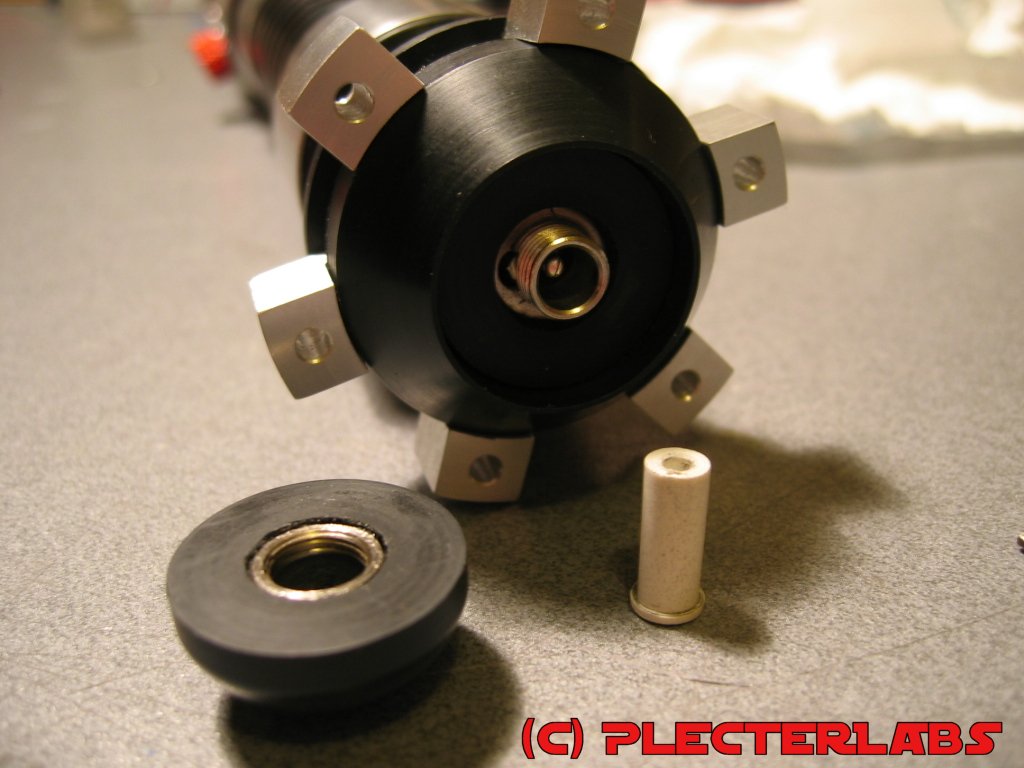 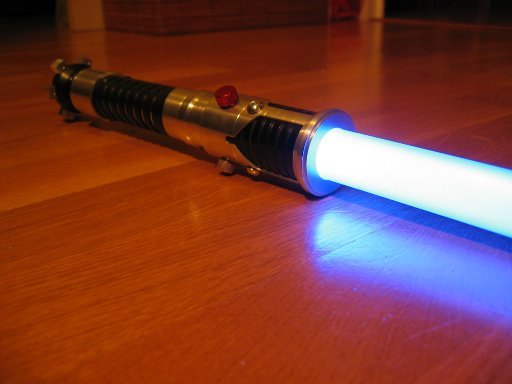 Results !! 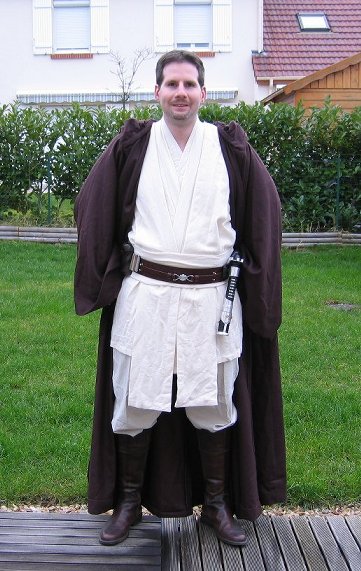 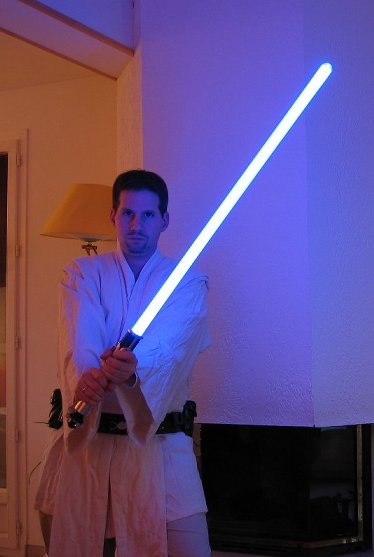 |
||